The air was thick and oppressive. The acrid taste of iron permeated her helmet’s respirator, heavy with a millennium of entropy. What could have befallen this place, wondered Shas’la Shu’to? A whole Gue’la sector deserted and left to rust like some long-sunken vessel. To the T’au, mankind’s primitive architecture always seemed blunt and overbearing, but this was worse. It minded her of the desiccated cadaver of a hulking and impossibly vast leviathan; a rib-like maze of collapsing gantries and stanchions.
Here’s how to get a genuine rust effect for your Warhammer 40,000 and Necromunda terrain.
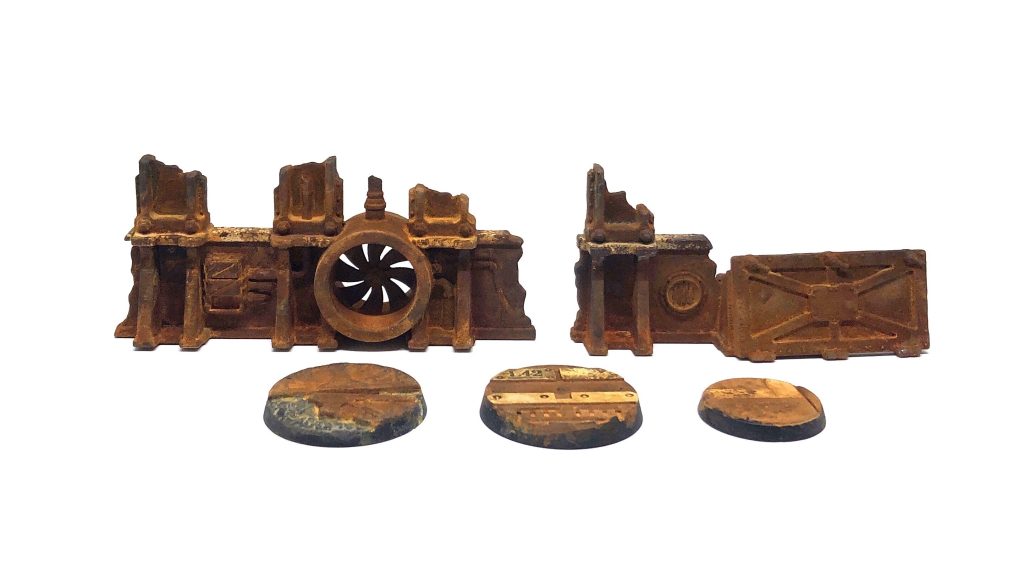
Anyone that’s read my T’au Kill Team articles may have picked up on my home brew setting, Xerica. It’s long been my dream to build a battlefield based on a derelict Adeptus Mechanicus sector, full of rusted buildings and dilapidated silos. This felt like a bit of a pipe dream until recently when I was inspired by some creative hobbyists on Instagram.
Here I’ll show you how you can get an incredible corrosion effect really quickly for your terrain by using paint that actually rusts! These are my first test prices but I’m quite please with how they turned out!
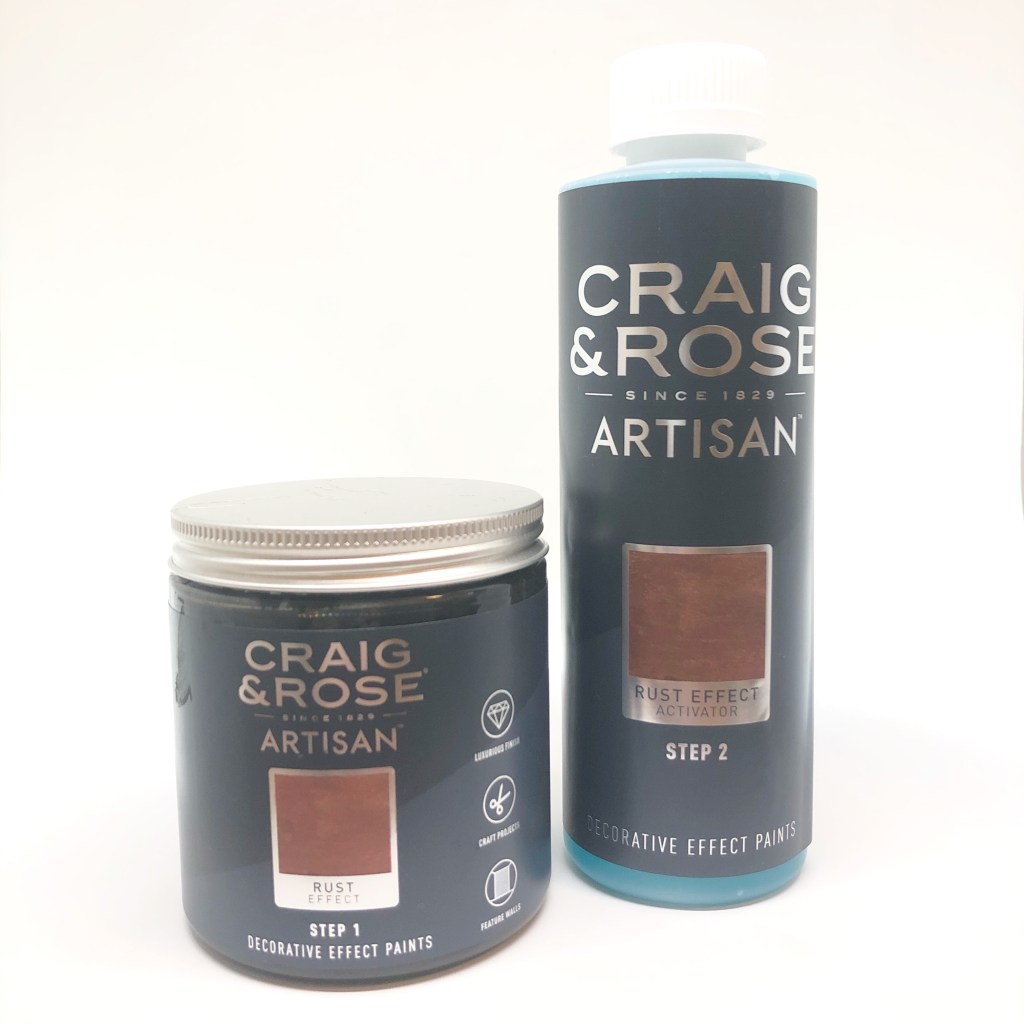
I’ve used Craig & Rose Rust Effect paint system. The base paint is a dark metallic grey, full of iron particles. When the Rust Activator is applied over the top, it starts reacts with the iron, creating genuine rust.
⚠️ A word of caution, the Rust Activator contains some really nasty chemicals. You should wear protective gear when using it and follow the safety guidance here ⚠️
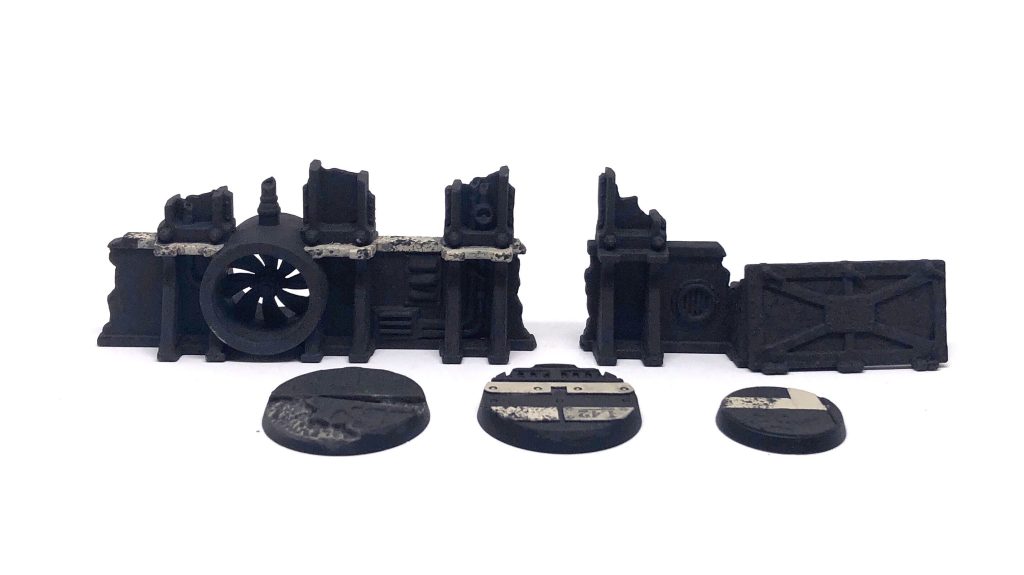
Step 1. Primer
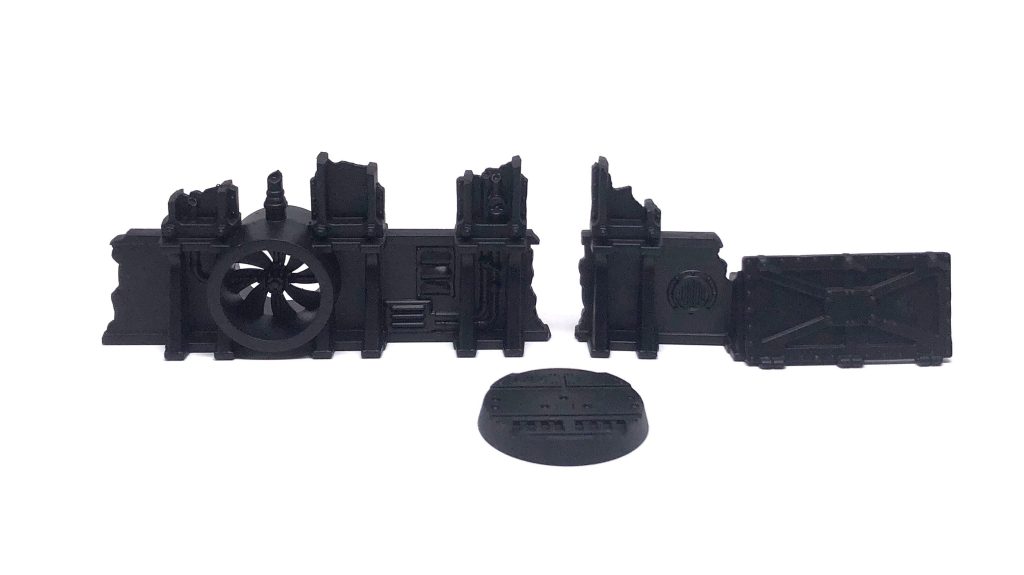
Start by priming the models with a dark grey or black undercoat.
Step 2. Base coat

Shake the Rust Effect paint well and apply an even, thick coverage over the model. The paint is thicker than hobby acrylics and has a very fine-grain texture due to the iron content. Be prepared for it to clog up some of the smaller details – this will all add to the effect.
Let the first coat dry for a few hours and then apply another solid coat all over. Despite the thickness of the paint, the iron content is quite thin and needs a few layers to build up. Depending on the size of the model you may want to apply a third coat too.
Step 3. Add spot colours
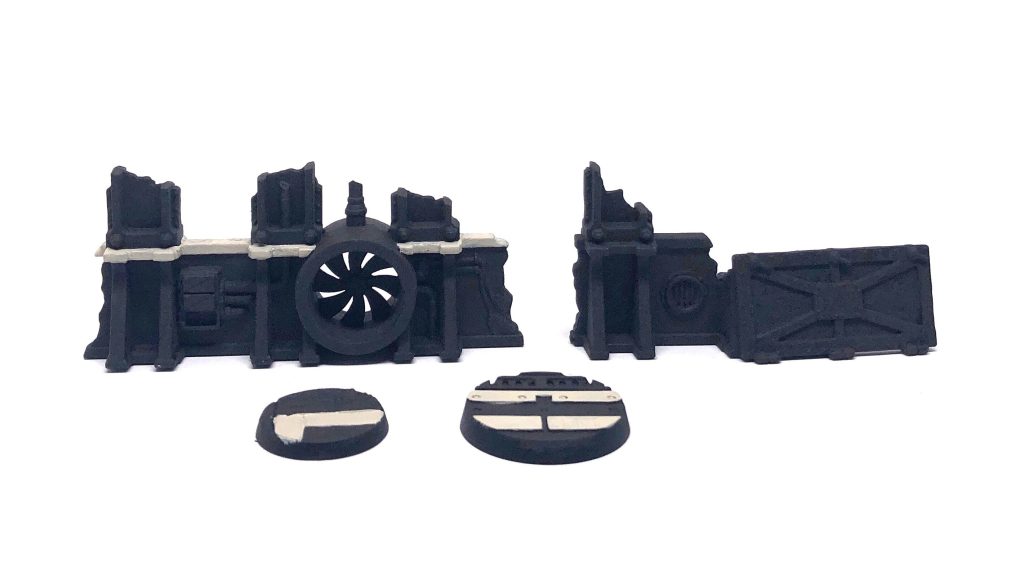
To add an optional pop of colour, block in a layer or two of a contrasting colour like Wraithbone on some of the details. You can apply this over the Rust Effect without any issues. You’ll want to do this before adding the Rust Activator, to benefit from the natural streaking and discolouring it will add.
Step 4: Chipping
Another optional step, add some chipping to the spot colour, to make the paintwork look damaged and flakey. To do this, use a bit of sponge (old blister pack foam or sponge scourers are ideal!). Dab the sponge in the Rust Effect paint (or a dark brown acrylic), remove excess paint on a bit of card or tissue and then dab it on the details to create a chipped effect. This works well when applied to the edges and corners where paint would naturally wear away.
Step 5: Activate the Rust!
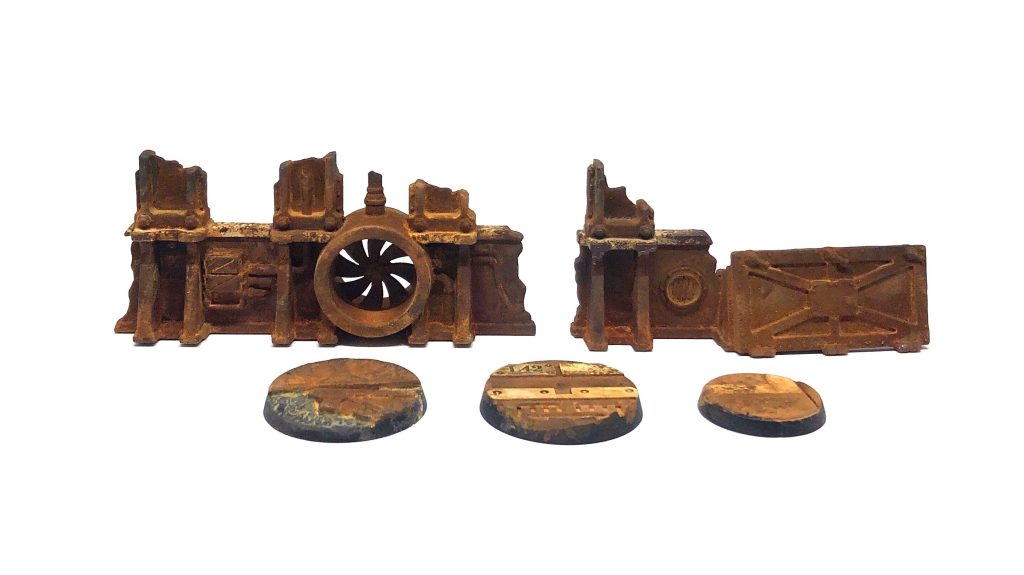
Now time for the sciencey but! Get your protective gear on and make sure you’re in a well ventilated area. Apply a liberal coat of the Rust Activator over the whole model. Fortunately, it doesn’t seem to react with any of the acrylic paints we used in the previous steps, but it will slowly start to begin the rust process.
Once dry, apply a second coat of Rust Activator. When this is dry, randomly blotch or spray water onto the model. This will add a nice rusty patina, and develop the effect further.
Keep adding water and letting it dry until you’re happy with the effect. It’ll take several hours to develop.
I can’t wait to try this out on some bigger Sector Mechanicus and Zone Mortalis pieces next. Let me know what you thing in the comments!
Lastly, I wanted to credit the Instagrammer @realbrokenfingers who inspired me to try this technique. He’s got some amazing rusted terrain on his profile – go check it out!
